he calculation of creepage and clearance distances (spacings) is one of the most important activities a product safety/compliance engineer or technician performs throughout the product development process.
Conducting this activity sooner rather than later is key to releasing a product on time and within schedule and budget constraints. Waiting to calculate creepage and clearance distances until the prototype stage, when safety evaluation and testing have begun, is almost always a recipe for disaster. Correcting spacing miscalculations late in the product development cycle will assuredly add unnecessary redesign and retest efforts, increase the risk of delaying production release until the issue is addressed, or even releasing the product without the necessary product safety approvals.
If you work on a technically savvy design team, they will likely turn to you for help in determining the appropriate spacings for the product far in advance of ordering any prototypes. If they do not come to you for help, then it would be wise to take the lead and supply this information even if not requested.
If you are unsure what I’m talking about, this article highlights what is involved in calculating creepage and clearance distances using a spacings calculator and provides recommendations for managing this activity on any future projects.
The first way is to consult with the third-party certification agency (Nationally Recognized Test Laboratory – NRTL) involved in the certification of your product. The NRTL will have a good idea of which standard(s) applies to your product.
Another method is to look at the specifications for existing products your company produces. The new product will likely have similar installation conditions and functions and have very similar safety requirements.
Finally, if these other two options don’t pan out, you can always search online for similar products and see what safety standard(s) those products meet.

Using a spreadsheet program like Microsoft Excel, recreate the information for each creepage and clearance table from the standard and use the lookup function to find the correct spacings given the various inputs provided by the design team.
Sometimes the standard(s) allows interpolation for spacing values that fall between two voltages but do not land directly on the voltage identified in the spacings table. In this instance, you will have to include the interpolation calculation as part of the lookup. You can use many resources online if you don’t already know how to perform interpolation in Excel.
Once the tables from the standard(s) are entered, and you confirm the lookup function is working correctly, you can use the hide feature in Excel to hide the tables from view.
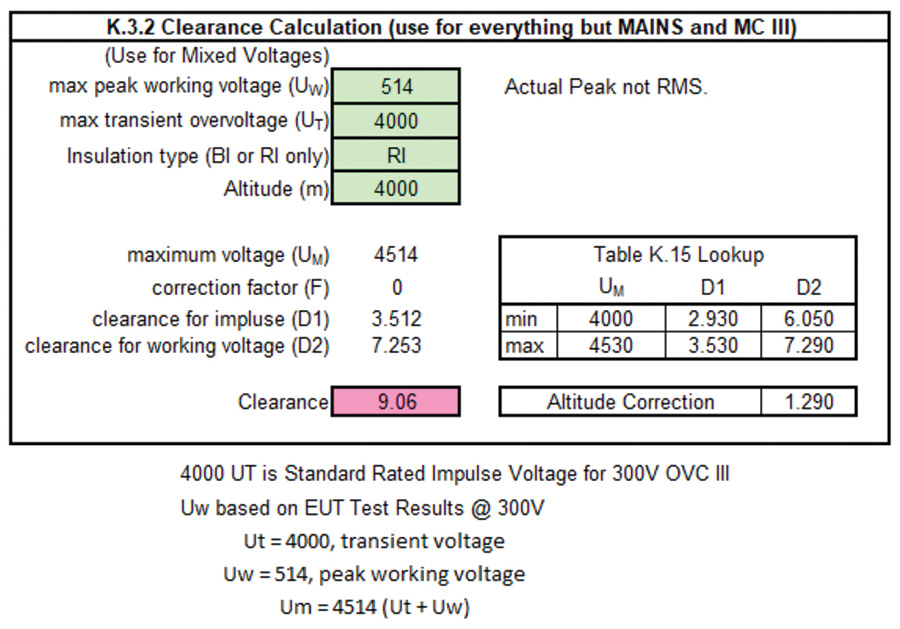
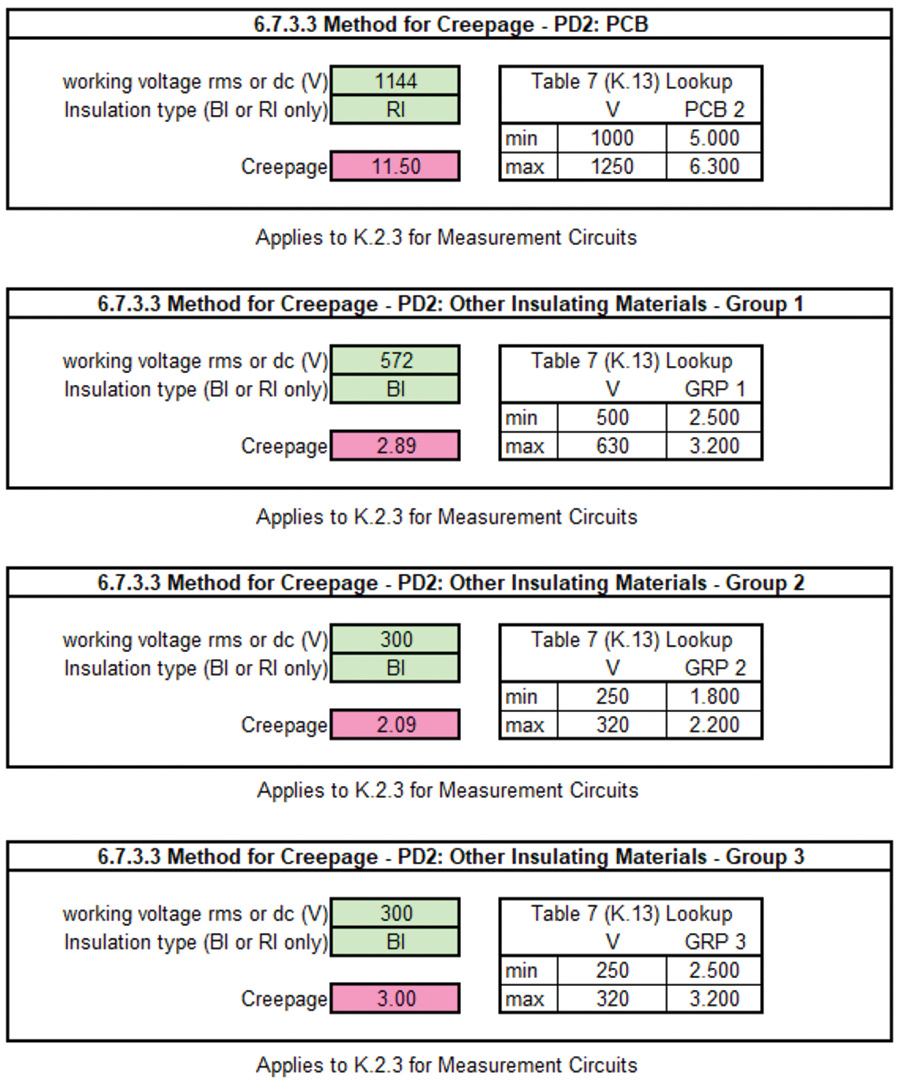
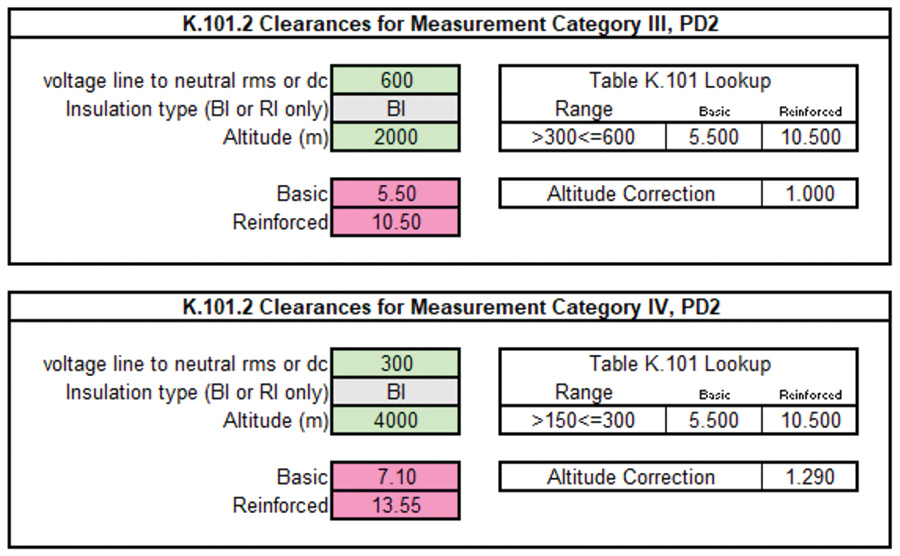
You will also want to create an esthetically pleasing area in which to enter information and obtain the output (i.e., correct spacings number). For spacings calculators I have created, I have made it so the entering of appropriate inputs is identified by green boxes, and where the results (in mm) are read from are identified by red boxes. Any grey boxes are those where the information is left unchanged.
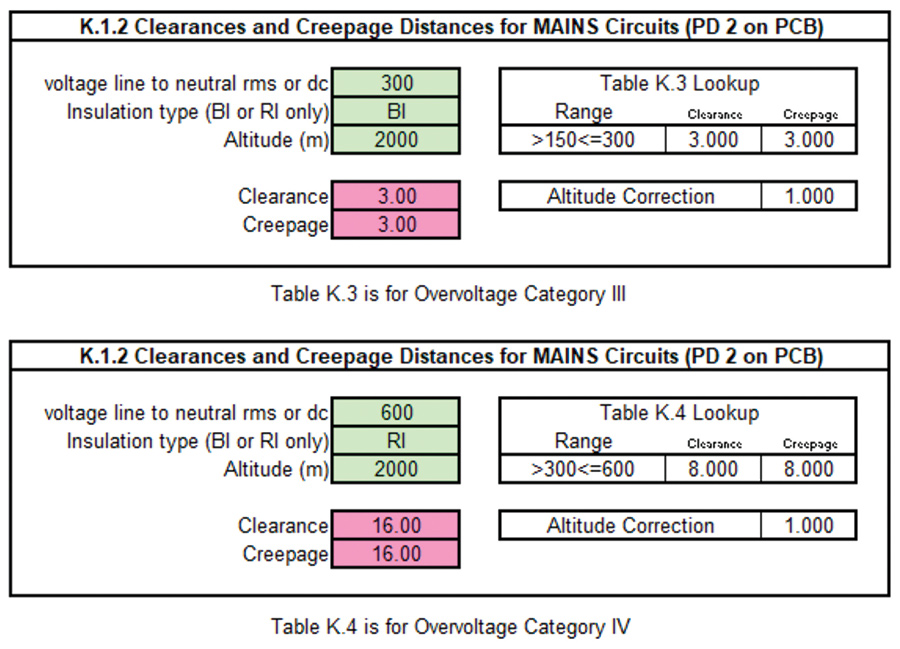
Figures 1 through 4 are example outputs of a spacings calculator created based on UL/IEC 61010-1 and IEC/UL 61010-2-030.
Pro Tip 1: For each of the spacings outputs, include lots of notes that will help you remember what the calculation pertains to and how it was derived.
Pro Tip 2: A similar process as documented above can be used to help calculate AC Voltage (High‑Potential, “Hipot”) and Impulse test voltages.
References and Further Reading
- EN/IEC/UL 61010-1: Standard for Safety—Electrical Equipment for Measurement, Control, and Laboratory Use; Part 1: General Requirements.
- EN/IEC/UL 61010-2-030: Standard for Safety—Requirements for Electrical Equipment for Measurement, Control, and Laboratory Use – Part 2-030: Particular Requirements for Equipment Having Testing or Measuring Circuits.